Wednesday, May 20, 2015

5S +Safety - A power point presentation


lean manufacturing
Before we started

lean manufacturing
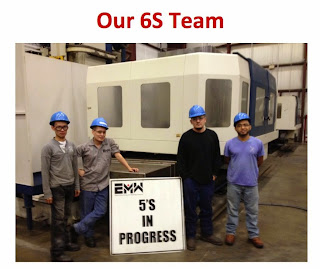
The team

lean engineering
Removal of clutter


shop clean up
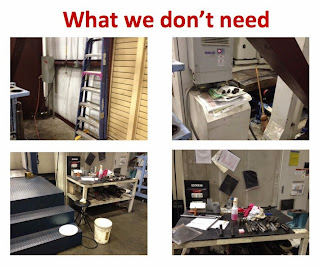
This is what we don't need

6 sigma
Who left this here?

clean up process
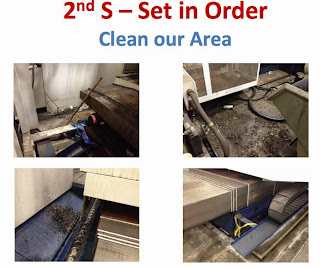
Start by setting in order

6 sigma
Clean and organize

Shine
Time to shine

Claen up
Shine some more

standardize
4th S - standardize

keep it clean
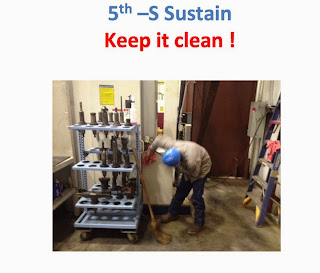
Keep it clean

Compairison
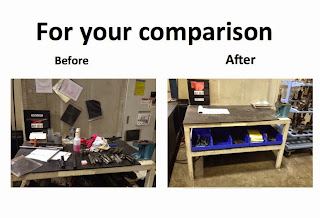
For your compairison

Compare
Compare some more

shop clean up
Compare some more

before and after
Before and after


6 sigma 5S
Our new look

machine safety
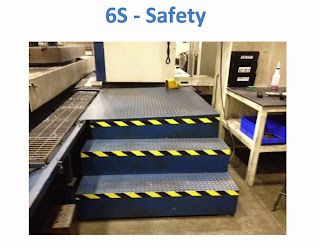
Added 6S for Safety

Sunday, May 10, 2015

Short form SOP's

RNMG machining


Standard operating procedures should be implemented for any process or operation that occurs in industry requiring multiple steps. Many companies publish over-sized binders and require third party contractors to meet the specifications outlined within them. This is an effective tool to ensure consistency across different suppliers. These giant books are confusing and cross-references are required from one chapter to another sub-chapter. The only way to implement them successfully is to practically memorize the whole document. Although a single document publication of a SOP is much simpler in the third party case, implementing such an all-encompassing approach internally for your processes will be quite an exhaustive task. Breaking this accepted practice down into smaller documents is more efficient, more easily understood and writers can place emphasis on important areas first. Stepping out of the writers box and implementing some visual tools can greatly improve interpretation and comprehension.
Use SOP’s to ensure that production processes are performed consistently and all regulations and requirements are always within compliance. An effective way to ensure nothing is forgotten or left out is to employ a checklist. Checklists are not meant to be a permanent part of the document but approved and turned in at job completion or scheduled intervals during the run. Complicated or multiple step processes benefit substantially by the use of checklists. 
Previously, I wrote an article about the benefits of pictures in operational documents. There is no exception here and the addition of diagrams with numbers and a subsequent legend takes understanding to the next level. 
To enhance process set up and in cycle time procedures the use of a process map can be invaluable. If a picture is a thousand words then a flow chart must be ten thousand in relationship to describing operations in words alone. This breaks the complexity down to single simple tasks that flow naturally. An operator no longer has to rely on memory to recall process details and order of operations. Set-ups now follow a previously well thought out structured path reducing time and errors.
 Skilled tradesman of any kind nowadays seem to be getting harder and harder to find. If you have one you pay to keep him, provide him with benefits and keep him happy. Your competitors are using the same tactics. The best philosophy is to start employees at the ground floor and train them upwards molding them into the ideal worker. This requires training and training can be considered a waste. Therefore it is a target for improvement. Well-written standard operating procedures can greatly reduce the learning curve.
I like to think of SOP’s as a cookbook for processes and the short form SOP implemented at every step in the process is a recipe for improved operations.

Saturday, May 2, 2015

Superior surface finishes

CNC engineering


Getting the right speed and feed to establish a required surface finish is sometimes a guessing game due to so many factors that are required to be “just right”. There are some general rules of thumb like: kick up the surface footage and turn down the feed. Parameters like surface footage, IPM feed and depth of cut are best set at the programming stage and not left for operators to experiment with. Learning the best guesses is very important for an efficient operation.
Tool pressure plays the most important role in a superior finish. The most important factor in increasing tool pressure is depth of cut. Getting this right should be first. We have all tried to sneak up on a close tolerance and missed it by one thousandth and had to take that little cut that made the dimensional tolerance but it totally blew the required finish. A sanding we will go.
A Cracker Jack machinist will calculate tool push off into the final offset and hit the tolerance and finish on the money every time. This comes with experience and a little knowledge about the machine tool that the part is running on. Depending on the hardness of the material a finish cut should be between .015 - .09 of an inch. A properly set finish cut will glaze the material causing it to shine.
Setting the correct RPM’s for the spindle should not be a difficult undertaking. If you are roughing efficiently with good insert life then the same grade of insert should finish well at about a ten percent increase in surface footage.
Tool nose radius plays a role in the final feed rate needed to return a desired finish. Smaller radius equals slower feed but there are limits to how slow you can feed with a given radius. The cutting insert gets to the point where it is no longer shearing the material and it begins to rub, negatively affecting surface finish. At this point a smaller nose radius should be used and the feed can be reduced again. Normally, a .015 nose radius tool at a .002 feed is the bottom of the barrel and different tactics need to be employed.  
By taking a CNMG that has a leading angle of five degrees and laying it down in the tool holder to cause this angle to be almost zero and then feeding inwards the flattened angle on the now trailing edge will “wipe out” the peak in the previous feed line causing an increase in surface finish. New inserts are now available that take advantage of this concept called wiper inserts and they work very well in most applications. Check with your insert supplier for these cutters that fit in standard holders.
Ceramics could be the answer. To get the most beautiful surface finish in a fraction of the time due to greatly increase surface footage employ ceramics in your turning operations. Seems like nowadays everybody knows about them but they just are not used to their potential. Many types and styles are available now. The newest ceramics are a hybrid called whispers and they can cut with coolant keeping the part cool and reduce the chance of fire.

Tuesday, April 28, 2015

Win-win morale

CNC engineering


Culture in an organization builds positively or negatively over time. It takes time to degrade and conversely it takes longer to repair. Employee morale drives the culture in an organization. Every employee has a hidden gem within waiting to be uncovered. Reveal these gems and now a treasure chest of opportunity lies abound ready to be fostered into productivity, efficiency and profits. Empower your employees and earn their respect. Engage your employees and instill ownership. An enthusiastic member of your team is productive. One bad apple can pull many enthusiasts down. Winning over one advocate for the company can convert a whole team. Morale starts from the top down reflecting how management directly handles situations within the company whether they are positive or negative. Implement some of the following ideas to assure you are continually building your morale positively.
All the literature states that the best metrics are a reflection of your company’s goals and this is the correct philosophy for managers and leaders. In the manufacturing area posted metrics should be set up to instill friendly competition between shifts or production teams. Front line supervisors, working together, can encourage competition between teams to achieve small increments towards greater productivity goals. Metrics used correctly can play a vital role in building morale and strong team spirit.
Proving to direct employees that getting on board is worth the effort is very important. Winning teams that meet or exceed goals should be rewarded. Not all rewards are monetary. Recognition and sometimes just a simple “thank you” or reiterating “good job” is the best reward a manager can give. We all work for money but job satisfaction and a feeling of accomplishment means just as much. In addition, prizes and gift cards set in a competitive atmosphere outlined to achieve goals played out on weekly or monthly bases returns high rewards at minimal cost. Think about it, what is the cost of an “out to eat” gift card for two.
How and what you do as a manager directly reflects the attitude returned by direct employees. You should always treat employees how you would want to be treated. Use your knowledge to gain respect and it will be returned. This doesn’t mean you are going to say what they want to hear but you say it firmly and you are fair across the board. Always lead by example.
Because everybody loves pizza this is my favorite. Try “lunch and learn”. Attendance is optional and it is held over the lunch hour. Attendees stand up and offer knowledge to earn their slice of pie. Talk about anything from how to calculate spindle speeds to debates about the parking lot. Anything that has to do with life at the job and stuff you face with pepperoni and anchovies.
A company newsletter can be used to communicate all kinds of pertinent organizational information from changes to employee benefits, next weeks holiday schedule and operational views from the president. The newsletter can be used to improve moral by listing promotions, employee’s birthdays, employment anniversaries to recognizing employees for business and home accomplishments in sections of the newspaper. The list goes on… This is a great way to stop gossip in its tracks.


Monday, April 27, 2015

Effeciently machining high temperature alloys

CNC engineering
Large CNC vertical lathe


Inconel, Waspaloy, Hastaloy and other high nickel alloys require very low surface footages and thus machine very slow. Many machining practices can be applied to ease their cutting ability. Increasing insert life, running the highest possible surface footage, depth of cut and immense coolant flow for the removal of heat in combination will greatly increase your productivity. Try some of these tips and apply the ones that best fit your applications and improve your cycle times.
The main focus should be right where the rubber meets the road, type, grade and geometry of the cutting insert. CNMG’s are very common and are usually utilized in every possible citation due to the fact that they can turn and face eliminating a tool change. If you have turned inconel with this insert you notice after a short while a burr begins to build in front of the cut. This material is work hardened and is very difficult to cut. It will eventually break the insert and the build up will have to be removed before cutting can continue. The fix for this is choosing a geometry that leads into the material such as a SNMG at 45 degrees. This keeps the lip from building up and hardening. Another economical factor relating to this geometry is that you have eight cutting edges as opposed to four on a CNMG. Use this geometry for roughing. If you must meet in a corner (i.e. the cut does not pass all the way through the material) then change tools and then eat the corners out with a CNMG. Normally, changing tools is not productive and you would never think this way but due to the long cycle times in cutting these materials a new mind-set is necessary.
Ceramic offers great possibilities if the application is correct. Usually this is a finishing operation due to depth of cut. These inserts do not work well with over-lay type materials due to inconsistencies in the welding. Ceramics have come a long way and a new type of ceramic that cuts well with the use of coolant keeping the part cool is called a whisper. Yes, ceramic with coolant. You want to choose the strongest geometry possible and that is in the form of a button. There is no cutting tip to break off and a circle is just inherently strong. You can see cycle time improvements as great as ten times over that of carbide.
“They are just not built like they use too” referring to the stability and rigidity of machine tools directly influences your ability to machine at high metal removal rates. Back to the rubber and the road analogy, an insert is going to wear at the tip faster than anywhere else no matter what your depth of cut is. If your machine has the rigidity it is far more effective to take a large cut. Choose the biggest insert possible, mainly because this insert will be thicker and will resist breaking.
The most detrimental factor in machining high temperature alloys is the accumulation of heat. Coolant flow and pressure is of utmost importance. Getting the cooling fluid down to where the cutting is actually happening is paramount. The physics of metal cutting is at a molecular level and the cutting fluid must have the minute size to reach this level. A small molecule has this ability with enough pressure. The addition of large molecules in the form of antifoaming and antibacterial will hinder the coolants ability to effectively reach this macro level.
As in any machining process a multitude of variables effect how a part is going to run. The only effective way to find the best practice is trail and error. What works best on one machine may not be the fix for its neighbor.

Adaptive machining

adaptive machining
Measuring probe

Previously, I posted an article on reducing operator intervention, which basically outlined ways to automatically make changes to a part set up or process without the operator doing any work. This cuts down on calculator and keypunch errors and increases uptime. With the goal of having a completely computer/CNC controlled operation we can strive to take the operator completely out of the process and observe continuous operation twenty-four/seven with no coffee or rest room breaks and take errors to almost zero.  This is probably an impossible task but using a combination of machine functions, tool life management and measuring probe applications you can custom form a process that is efficient, significantly reduces the occurrence of nonconformities. With the extra man-hours achieved you can now have an operator run two or even more machines.
A measuring probe is at the heart of this operation and it will be necessary to use all of its functionality.  Probes can and should be used for processes other than just in machine CMM functions. They can also be used effectively to set tool heights with grouped tools in the ATC, probe and make wear offsets, setting work offsets and fixture identification.  The list goes on and on and is limited only by your ingenuity. By probing and storing desired data and referencing system variables for position, distance to go or any other pertinent machine data, the value for almost any unknown can be calculated and used in your programs. Study the chapter in your operator’s manual that describes custom macro programming and familiarize yourself with the system variable list and decision-making operators.
Part programming can play an important role in adaptive machining through the use of interrupt programs. Use what you learned about probes and macro programming to make decisions when and where process modifications need to be made then invoke an interrupt call at those points to logically call the correct program in each instance. Be sure to learn the difference between sub program and macro program interrupt calls because each type of call returns to a different position when the interrupt program is complete. Interrupt programs allow for execution of another program while the interrupted program waits. When the sub program or macro program completes, execution picks up in the main program where it previously left off.
This article has solved no problems, not given the answer to questions you may have or typed out any sample programs. It was merely written to open your eyes to the possibilities. Every machining process is different and special attention to your particular case needs to be studied to arrive at a custom fit process. There are many obstacles to overcome if you are starting from scratch. I would suggest getting some experienced engineering help.

Sunday, April 26, 2015

Low hanging fruit

identifying waste
Just in time tomatoes

Identifying waste

I’m not talking about determining what belongs in the trashcan. Waste really means anything unwanted. If we are talking about your yard or your garden, then waste is a overripe fruit or an annoying weed. These waste are easily identified and have a simple corrective action: pick the vegetable sooner and pull the weeds as they appear. At work, manufacturing and production waste are sometimes hard to identify. Especially later in the process when you have depleted your improvement ideas and implemented everything you can think of. Are we done or can we continue to improve? Lean manufacturing methods provide tools and ideas to identify manufacturing waste. Now it is time to check these types of operations. There are 7 total non-value added categories. The simple and obvious ones are not in this article. They right are in front of you ripe and ready to be picked. Each different category is about a different mind set or thought pattern needed for identification.
Quality is an up most concern and a top priority in every organization. Look at your process with a different mind set. We are programmed to improve and improve again but there is a point where this is taken to far and it’s called over production. Producing a 32-micron finish where only a 63-micron is required. Now the federate can be increased reducing cycle time and thus increasing value. This is only one example. Carefully review the customer requirements and meet these specifications exactly but do not exceed any. Personally, I have had parts rejected due to a superior surface finish. It’s seems crazy but there was a reason for a 125-micron finish and it was expected to be maintained. I thought we were delivering a higher quality product than our competitors.
Another overlooked waste is unnecessary motion. This type of waste is considered invisible waste. Most importantly, check for waiting or idle times, unnecessary reaching or footsteps, unproductive meetings and redundant paperwork. There can be a non-value adding weed hiding in the darkest corner or the most over-traveled path.
You have to check your tomatoes every day. Pick each when the time is right ensuring that not to many build up on the vine. With this in mind, think about your company’s inventory. Inventory cost money and takes up valuable space. You should strive to pick your fruit just in time. Not to early and never late. Managers are scared of late deliveries and the easy fix is to put some food on the shelf. The correct action is to continually improve process times thus eliminating the need to stock parts.
Waste is everywhere and stepping outside the garden and looking in at your processes in varying lighting will make all the varieties of weeds show their stems. At this stage of growth, pulling them is simple, finding them is hard.